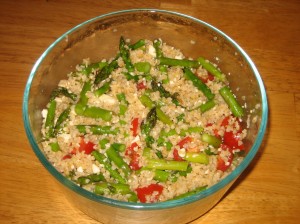
Asparagus Tomato and Feta Salad

Asparagus 003Asparagus 002


I love spring.  One of the main reasons I love it is that the temperatures get warmer and everything that is bleak and bland gets more colorful – including food!!

One of the great foods of spring is asparagus.  I love it every way I have ever eaten it – raw, wrapped in prosciutto, in an omelet, roasted, blanched, breaded, with pasta, without pasta..you name it.  It’s a wonderful tender vegetable that is also packed with nutrition and springtime is when it is in season! When choosing asparagus, make sure you try and go for the skinnier stalks as they are more tender and do not need peeling.

The other day, I went to the store and our local grocer was a having a really good sale on this yummy veggie. It was $1.49/pound. Considering this was the cheapest I had seen asparagus go for in years, I stocked up.  Like crazy.  So, we have been eating asparagus with pretty much every meal and no, I am not sick of it!  The other night I made a shrimp and asparagus pasta that was okay, but needs tweaking.  When I get it right, I will share it with you.

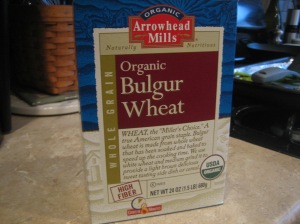
Today, I made a great springtime salad using Bulgur wheat.  Bulgur wheat is a very nutritious grain. It is low-fat, low-calorie, high in fiber and has no cholesterol. It can be found in the organic section of most grocery stores or in the rice section. If you cannot find Bulgur wheat, do not fear.  You can make this salad with pasta, couscous, rice, lettuce, quinoa, etc.  As always, you can alter or change the ingredients to fit your taste, but I definitely think this one is a keeper!

Ingredients:

1 cup Bulgur wheat

1 1/2 cups of water

1/4 cup extra virgin olive oil

1/4 cup fresh lemon juice

sprinkle of garlic powder

salt and pepper

1 bunch of asparagus, cleaned with the bottom parts snapped off (nature tells you where to snap them – just bend the bottoms and they will break off)

cherry tomatoes

feta cheese

Directions:

1.  Bring 1 1/2 cups of water to a boil.

2.  In the meantime, put one cup of Bulgur wheat along with about a teaspoon of salt into a glass bowl.

3.  Pour boiling water over Bulgur wheat and salt.  Cover and let sit for 30 minutes.

4.  Add olive oil, lemon juice and garlic powder.

5.  Cover and refrigerate for about two hours.

6.  Preheat oven to 400 degrees.

7.  Toss asparagus spears with olive oil, salt and pepper.  Enough to coat generously.

8.  Line a baking sheet with foil and roast the asparagus for about 8 minutes (you do not want them too soft).

9. Let cool, cut into 1 inch pieces and add to Bulgur wheat.

10.  Slice cherry tomatoes in half and add to salad.

11.  Add feta cheese. I don’t really measure the cheese.  Just add enough to your liking.

12.  Optional – add freshly chopped parsley and one more squeeze of lemon juice. You could also add cooked shrimp or chicken or beans for a little protein.

Enjoy!!!
Sweet Potato Pie

2-4 002


This is a recipe from a cookbook that one of my students gave me many years ago. It’s sweet potato pie and it’s from “Are you Hungry Tonight?” which is  a collection of Elvis Presley’s favorite recipes. So far, everything I have made from it is delicious, though I can see why he had trouble with his weight later on in life.  As usual, I try to make it a little lighter and my family has not even noticed!  This is now requested at Thanksgiving and Christmas dinners  and even at regular family gatherings.  It’s delicious and not as fattening as you might think.  Plus, sweet potatoes are loaded with beta-carotene along with other vitamins and minerals and are not just available in the fall.  It’s one of my favorite winter foods that I make into March and April.

Ingredients:

1 refrigerated pie crust (I like Pillsbury)

1/3 cup butter at room temperature (it makes it so much easier!)

3/4 cup of granulated white sugar

2 eggs, beaten

2 cups of mashed sweet potatoes (usually around 3 or 4)

3/4 cup light or fat free evaporated milk

1 tsp.  vanilla

1/2 tsp ground cinnamon

1/4 tsp. salt

Directions:

1.  Peel sweet potatoes and cut into cubes.

2. Boil in water for about 12 minutes or until fork tender.

3. Drain sweet potatoes and put them right back into the pot you boiled them in.  Using a fork or potato masher, mash away!

4.  Preheat oven to 375.

5.  In large mixing bowl, cream the butter and sugar together.

6. Add beaten eggs and mix well.

7.  Add sweet potatoes, milk, vanilla, cinnamon and salt and mix well.

8. If you are using a stand-up mixer like a Kitchen-Aid, make sure you give it a good stir as some of it inevitable gets stuck on the bottom.

9.  Unroll pie crust and place it over a pie plate.

10.  Pour mixture into the pie shell and bake for 15 minutes.

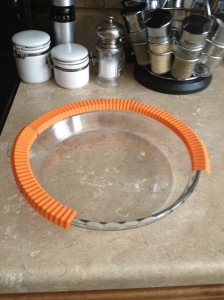
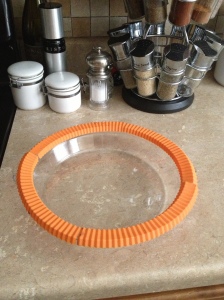
11. Cover the edges of the pie plate with foil or silicone covers (see below) and bake another 25 minutes.

12.  Pie is finished when you can stick a butter knife it and it comes out clean.

13.  Cool on wire rack at least an hour before serving.

NOTE – This is usually served as a side dish, but I have also eaten it for breakfast or as a dessert.  Yes, it’s THAT good!

Pie Guards 014

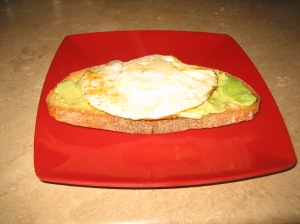
Open-Faced Avocado and Egg

Egg and Avacado


Right now, I am obsessed with avocados. I remember hearing an interview with Kim Cattrall (Samantha from “Sex and the City”) on how she stays so youthful looking. She said that she eats 1/2 an avocado or salmon every day. Well, it’s worked for her and since I am about to approach the big 4-0, I thought I would try it for myself. So far, so good.  At least I don’t see any new wrinkles…

Anyway, according to http://www.webmd.com there are many reasons to include avocados in your diet.  Here are a few:

Avocado Nutrition

Avocados are a good source of fiber, potassium, and vitamins C,K, folate, and B6. Half an avocado has 160 calories, 15 grams of heart-healthy unsaturated fat, and only 2 grams saturated fat. One globe contains more than one-third daily value of vitamin C, and more than half the day’s requirements of vitamin K.  Recent research shows that antioxidants such as lycopene and beta-carotene are better absorbed with the healthy monounsaturated fat avocados have in abundance.

So, here is a very simple, delicious and semi-nutritious recipe for you to make for breakfast, lunch or even a snack. You do not have to fry and egg either. I have eaten it with a soft-boiled and poached egg. Speaking of the egg, that’s the only thing you have to cook!

Ingredients:

1/2 avocado

1 egg

salt

1 slice of bread

Directions:

1.  Toast the bread.

2. Fry egg or egg whites to your liking (I like the yolk a little soft.)

3.  While the egg is cooking, cut an avocado in half and remove the pit.

4.  Scoop out one half and mash it down on the toast (soooo much better and healthier than butter or cream cheese!)

5.  Sprinkle with salt (optional).

6. Top with fried egg.

Simply wonderful!

TIP – to avoid the other half from browning, you can do one of two things:

1. Eat it!

2. Sprinkle with a little lemon juice and wrap tightly in plastic wrap for later on or the next day.

Ham, Cheese and Jalapeno Hash Browns

HASH 2

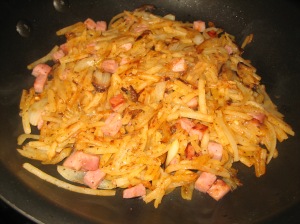
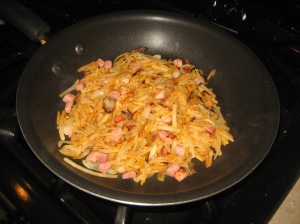
My husband usually makes breakfast on Sunday mornings. He is a phenomenal cook and likes to use a lot of spice in his dishes.  He knows how to put in just enough heat to enjoy the flavor of the food, yet make your taste buds dance in your mouth.  And I don’t know what it is about spicy food, but once I start eating it, I want more. And more.  No matter how spicy it is!  This weekend, he made a Ham, Cheese and Jalapeno Hash Brown with a fried egg on top. It was incredible!

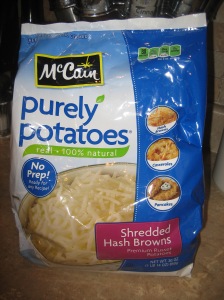
You can easily up or down the heat in this dish.  You can add more or less chili powder and cayenne or omit them all together if you only like a little bit of heat.  Also, for years, we would peel fresh potatoes and slice them on a cutting board or mandarin.  But then, one day, I found my new favorite pantry staple.  Frozen shredded hash browns!  They are cheap, easy and pretty much a blank palette so you can season them however you want.  In fact, I am going to give you two recipes today. One for basic hash browns for those who don’t like heat and one for the Ham, Cheese and Jalapeno Hash Browns.  Here we go!

Basic Hash Browns

Ingredients:

1 sliced onion

salt and pepper

3-4 cups of McCain’s frozen hash browns (they are the best in my opinion)

Directions:

1. Saute’ sliced onion in about a tablespoon of extra virgin olive oil.

2.  Add salt and pepper to season. (note: if you want to add ham or another meat at this point, go for it!)

3. After about 5 minutes, add the potatoes.  Mix together.  Let it cook about 7 minutes.

4. Using a spatula, flip sections over one at a time until you get a nice golden brown.  If they look a little soft, add a little more olive oil, but you shouldn’t need more than another tablespoon. Serve hot!

And, now, for all the spice lovers out there…

The Ham, Cheese and Jalapeno Hash Browns

Ingredients:

1 small sliced onion

Extra virgin olive oil

salt and pepper

1/8 tsp cayenne pepper

sprinkle of crushed red pepper flakes

1 tsp chili powder

1/2 cup diced cooked ham

1 jalapeno, diced with the seeds lightly removed (If you don’t like a lot of heat, remove all the seeds using a small spoon, not your fingers!!)

3-4 cups of McCain’s frozen hash browns

1/4 cup shredded sharp cheddar cheese

Directions:

1.  Saute sliced onion in about 1 TBSP extra virgin olive oil.

2. Season with salt, pepper, cayenne and chili powder

3.  After about 5 minutes, add the diced ham and jalapenos and cook another 5 minutes.

4. Add 3-4 cups of the frozen potatoes and mix well.

5.  Let cook about 7 minutes and using a spatula, flip over sections one at a time.  You want to get all of the potatoes browned and blended.

6.  Adjust seasoning if necessary (sometimes you might need a little more salt since potatoes absorb it quickly)

7.  Add shredded cheese to the top and serve with a fried egg on top if desired.


McCain
HCJ Hash Browns


Crazy-Good Corn Casserole

Soup 002


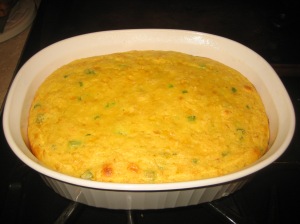
This is a soft cake-like  corn casserole that you can serve with pretty much anything. I especially like it with spicy food because the sweetness of the corn cools your palette a little before you take another bite of spicy goodness. It is also great with steak, chicken and fish – basically anything you would normally serve corn with.  It was adapted from The Pampered Chef’s “Festive Scalloped Corn” but I made it a little lighter and, as my husband would say, “goose-a-fied it.”

Ingredients:

1 can creamed corn, undrained

1 can whole kernel corn with peppers if you can find it. If not, just plain corn will do. (Drain this one)

1 cup reduced fat sour cream (or one 6 oz container of plain Greek yogurt to be extra healthy)

3 eggs

1 box of corn bread mix (I use Jiffy)

2-3 scallions or red onions

1/4 cup diced red peppers

5-6 dashes of hot sauce (optional)

Directions:

1. Preheat oven to 375.

2. Whisk eggs in a large bowl.

3. Add all other ingredients to the eggs and stir well.

4. Spray oval, round or square baking pan with Pam or another non-stick spray. (You could butter the pan and make it even more delicious!)

5. Bake for 35-40 minutes or until top is set and edges are golden brown. Let it sit about 5 minutes and then cut into squares.

Cauliflower Soup

Soup 020Soup 022


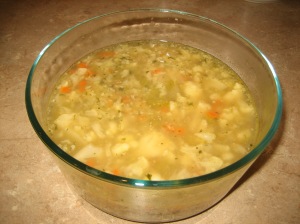
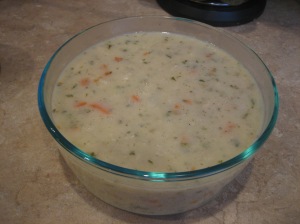
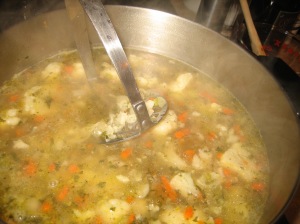
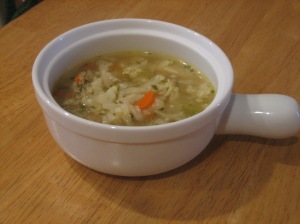
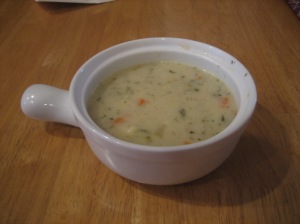
Cauliflower – I love it. I usually like it raw dipped in ranch dressing or hummus.  I also like cream of cauliflower soup, but try not to eat it too much as I know heavy cream is not that great for your diet.  However, I saw a recipe from Ree Drummond (a.k.a. The Pioneer Woman) and tried her version of cauliflower soup. And I LOVED it!  My husband ate it every day for lunch and with dinner and then asked for more. Yes, it’s that good.  I make both versions now all at once. After step 8, I take some out and put it in a bowl for the healthy version and then cut the ingredients in half for steps 9-15 to make the creamier version.  Both soups also freeze well so you can have them for later.

Here we go:

Nutritious Cauliflower Soup

Ingredients:

1 head of cauliflower, washed and roughly chopped into florets

1 large onion, diced

2 carrots, peeled and diced

2 stalks of celery, diced

2 TBSP parsley (dried or fresh, if possible)

salt and pepper

1 quart low-sodium chicken broth (I like Progresso)

1 quart regular chicken broth

1 1/2 TBSP extra virgin olive oil

1 pat of butter

(For the creamy version – you will also need:

4 TBSP butter

2 cups of milk

6 TBSP flour

Directions:

1.  Using a large pot (I use a 6 quart one), heat the olive oil and pat of butter.

2.  Saute’ and season onion, carrots and celery with salt and pepper.  Cook until they are soft, about 7 minutes. (Don’t put too much salt in, especially if you are not using a low-sodium version.)

3. Add chopped cauliflower and parsley.

4. Mix well and cover.

5.  Let steam for about 15 minutes on low heat.

6.  Add chicken broth and bring to a boil.

7.  Lower the heat and let it simmer for 15 minutes.

8.  Using a potato masher, mash down cauliflower into small pieces.

At this point, if you want to keep it healthy, adjust seasoning and serve.

cauli soup 3Soup 014

If you feel the need for some calcium or want a creamier version, continue on with this one, which is very close to Ree’s…

9. In a saucepan, melt 4 TBSP of butter.

10.  In a separate bow, whisk together 6 TBSP flour with 2 cups of milk.  Ree recommends whole milk which will make it nice and thick and creamy, but we use skim.

11. Add milk mixture to the melted butter, whisking the entire time.

12. Slowly add to the large pot of soup.

13.  Let simmer for 15 minutes and enjoy!

Soup 018


Ree adds half and half and serves it with sour cream.  I bet that is absolutely decadent!! For her recipe, go to http://www.thepioneerwoman.com

Vegetable Quiche

I love Quiche. Love it! I remember my mother making different types of Quiche growing up in the 70s and 80s. We mainly had it for lunch. As a child, ham and cheese Quiche was my favorite along with broccoli and cheese.  I still love cheese.  This recipe is focused more on the vegetables, though you could easily add more cheese. It’s adapted from my mom’s Betty Crocker cookbook. Feel free to play with the measurements once you’ve made it the first time. The Quiche could be served for breakfast or lunch.  Or you could have it as a snack. Or even dinner, I suppose.

You’ll notice that I make it using a mixture of egg whites and whole eggs (my hubby has borderline high cholesterol).  If you prefer to use all eggs, go for it.  This makes 8 decent slices and 6 nice slices. If you’re using it for lunch, I would say cut it into 6 slices.  For breakfast or a snack, I would do the 8 slices and serve with some bread.

Ingredients:

2 whole eggs

2 egg whites

1/2 cup each of diced onion, red pepper, mushrooms, broccoli etc. Whatever veggies you have leftover.

3/4 cup of milk (we use skim, but you could certainly use whatever is in your fridge, including half and half. MMM!)

1/2 teaspoon salt

1/4 teaspoon pepper (I use white pepper sometimes. Just to not have black dots, but the taste is the same)

1/8 teaspoon cayenne pepper (optional)

1/2  cup shredded sharp cheddar cheese (or whatever you like – you might want to add more if it’s a milder cheese)

1 frozen pie crust (thawed according to package – I like Pillsbury)

Directions:

1. Preheat oven to 425.

2.  Spread the crust out in a pie dish.

3. Whisk eggs together with milk.

4. Add vegetables, spices and cheese and mix well.

5.    Pour into pie shell (sometimes I sprinkle a little parmesan cheese before I bake it).

6.  Bake 15 minutes.

7.  Reduce temperature to 300 and bake for about 30 minutes longer (I also cover the sides of the crust at this point so they don’t burn. You can use foil or silicone pie guards (see below)).

8.  When you can put a butter knife in the middle and it comes out clean, it is done.

9. Let stand about 10 minutes.  Cut and serve hot or at room temperature.

HINT#1 – Of course, you could add chopped ham, sausage, bacon or another meat. If so, you might want to cut back on the salt a little.  Just a thought…

Hint #2 – I purchased these pie guards from Current magazine, but am sure you can find them online or in a kitchen store. They are great for any pie. I use them when I  use a frozen pie crust, as the edges tend to burn when baking at high temps (such as when I make apple or pumpkin pies).

Pie Guards 014Pie Guards 013Blog Pics 001

Lemon Dill Rice

This is a lite and healthy way to prepare rice.  It goes well with chicken or fish.  If you do not care for dill, you can always substitute parsley or basil.  Just try and use a fresh herb!

Lemon-Dill Rice

Blog Pics 005

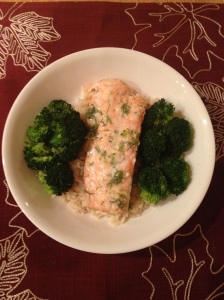
The picture shows the rice served with steamed broccoli and Garlic-Dill-Citrus Salmon. See blog for that recipe.

Ingredients

1 cup white rice

1 tsp each lemon juice and lemon zest (zest the lemon before you cut it to juice it!)

2 ¼ cups chicken broth or stock

½ tsp Olive oil

1 tsp chopped fresh dill


Directions:

  1.  Bring 2 ¼ cups of chicken broth and olive oil to a boil.
  2. Add 1 cup of rice.
  3. Turn on low and cook 25 minutes or until desired tenderness.
  4. Add the lemon zest and juice
  5. Add a teaspoon of chopped dill.
  6. Mix together while warm.
  7. Serve immediately.

Brie Gowen

Savor the Essence of Life

Drowning in Sufficient Grace

..."My grace is sufficient for you, for power is made perfect in weakness" (2 Corinthians 12:9)

WordPress.com News

The latest news on WordPress.com and the WordPress community.

The Cooking Goose

Cooking and Baking and Blogging, Oh My!

LOVE-the secret ingredient

Like to cook? Like to eat? Be a part of the conversation.

EatWellChef

UNBIASED

The Gourmand Mom

Good food, seasoned with a dash of life